Bergen Davis
Photography

Capturing Great Sunsets
Author : Bergen Davis. Published: July 19 2020
The science and art behind capturing that flaming ball of fire.

A sunset is a gate way into the eyes of the universe. A proof that no matter how the day went it can end beautifully, they display the most enchanting colors the evening sky has to offer. I have spent quite some time studying the art of sunsets and have prepared these tips to help my fellow shooters make the most out of the setting sky.
So get ready, we are about to fire those cameras up. The following are the most vital in my opinion in capturing eye pleasuring sunsets:
- Location
- Time
- Camera and Gear
- Post Processing
Location
Have you ever heard realtors say Location! Location! Location! ?
Well friends sunsets are not much different. The location where you choose to observe the sunset directly impacts the composition of your picture. It can help to promote the soft light features that the sunset offers or completely obscure it.
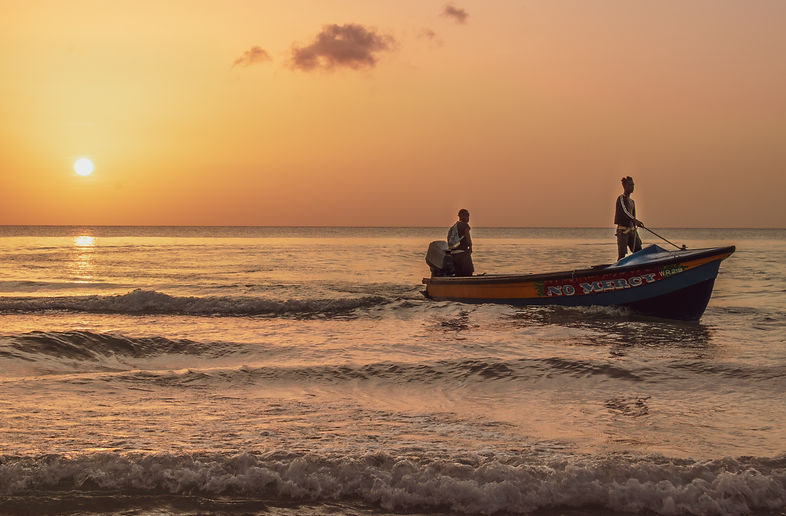
For beginners I would recommend the beach, it’s a no brainer, The water gives a glistening glow when the warm tonal light hits its surface, also there aren’t much other elements at play apart from the sky and the water, Thus you can focus properly on composing the sun within the shot.

After you have mastered the location of the beach, you can start to take on more advanced settings, Such as capturing the sun setting behind a hill/ mountain or even buildings (for all you concrete jungle inhabitants.) These will lead to some unusual and unique shots
No matter the location you choose, in the end the most important factor is that the environment enhances the composition of the shot. If you are unsure of what composition means or how it impacts your photo take a look at my previous article and it will show you step by step how these technical terms apply to photography.
Time
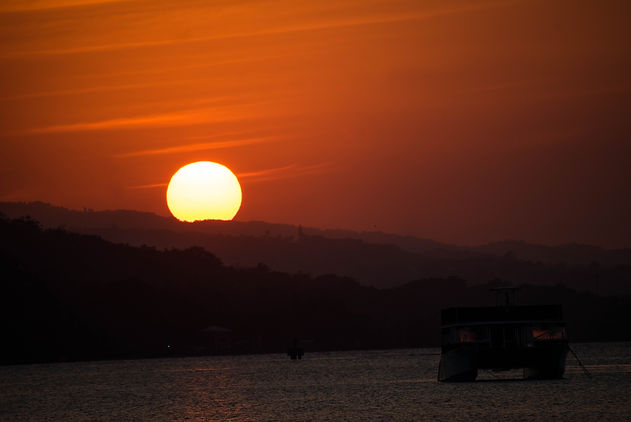
This is the moment where you jump onto Google and type” time of sunset “. You guessed it ! Knowing when the sun will set in your area is another important factor, In my experience, as a rule of thumb , I am always on location ready to shoot at least one hour before the sun sets. The reason behind this, is that you will be able to capture the changes in the color tones of the sky, shifting from harsh yellow until it reaches soft warm orange. If there are enough pollutants and dust within the atmosphere, you may be even lucky to see pink or red! How cool is that.?
This is another personal tip. The day of the month is an influential factor in sunsets. The sun appears closer to the horizon right before and right after a full moon. The result is that the sun appears enlarged and defined in your shots. Additionally the colors are more vibrant and they radiate thought the sky.
With that being said patience is another key. As I mentioned before the colors in the sky will shift while the sun makes its journey below the horizon. Therefore it is pertinent that you observe the full cycle until the sun disappears. So sit back, relax , you are in for a real treat.
Camera and Gear
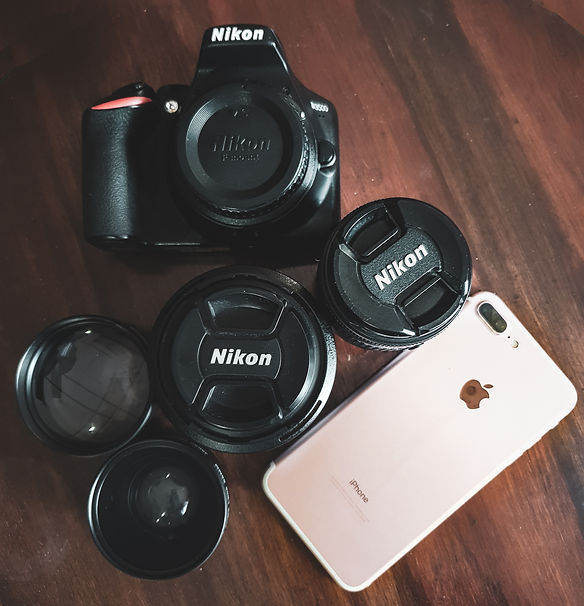
Disclaimer :So for this section I will be speaking specifically for persons out there with full body digital cameras. (DSLR , Mirrorless )
First off, take the necessary time to clean the camera and the accessories you will be utilizing, Use lens fluid and a lens cleaning cloth to give your lens a good exfoliation. Ensure that there are no dust particles present on the lens. Secondly take your DSLR, lock up the mirror for cleaning, after which you will use an air blower to remove dust particles trapped on your sensor. If you are unsure how to do this, there are tons of videos on YouTube that show DIY camera cleaning. The reason behind cleaning your camera, specifically for shooting the sunsets is that dust particles become more noticeable in shots when you’re shooting the sky because of its subtle color scheme. Doing this will save loads of time in post editing, improving your skills as a photographer.
After cleaning has been done, now pack the essential items, these are :
Tripod
Wide angle lens ( 18mm to 35mm focal length will do )
Telephoto Lens ( 150mm to 500mm is optimal )
Neutral Density Filter (ND) (optional )
Camera Body (ofc lol ).

The idea behind the tripod is that it reduces vibration and shaking that is associated with hand held setups, thus resulting in sharper images. The variety of focal lengths in your arsenal, allow you to obtain different perspectives of the shot. When sunsets are taken using a wide angle lens it can show the attractive beauty of the surroundings and how the sun complements the overall image. On the other hand a telephoto lens simply zooms in and focuses directly on the ball of fire in the sky. ND filters will give you room to experiment with slower shutter speeds , Applying this technique will provide your shot with an entirely different feel, Furthermore if you have decided to shoot by the beach or water , ND filters when applied to slow shutter speeds can give the water a silky smooth flowing look.
Also don’t forget to capture your sunsets in manual mode using the specified RAW format. This will help in getting the most out of your image in post processing. In most cases when shooting a landscape with the sun in the background, I tend to keep an aperture of F16 or greater . My ISO is at its lowest setting,( I hate noise ) and shutter speed adjusted to compensate for optimal exposure . In addition when operating the camera, ensure that the exposure metering system is pinpointed on the sky and not the environment. Initially the image maybe underexposed, not to worry, once imported into editing software the exposure can be readjusted. However if the shot had been exposed in terms of the environment and not the sky, the end result will be an overexposed and washed out image of the sun, defeating the whole purpose.

85 mm , f 22, 1/4 s ISO: 50
Another feature to play around with is the white balance. Use test shots to carefully see which WB setting matches the real life view of the sun. In all truth I mostly leave white balance on auto in these scenarios.
IMPORTANT !! If you lack any of the previously mentioned gear, Don’t let that stop you. I started shooting sunsets on my smart phone, Just keep your hand steady and shoot. It was still a beautiful experience. A camera is only as good as its photographer.
Check out the image below, It was shot on my Note 9 Smartphone

Post- Processing
So you have made this far in the article. Congratulations!!!. Now that you have captured your photograph. Throw that bad boy into a Post-Processing Image Software, Personally I utilize Adobe Lightroom Classic , However there are plenty of free options out there. (GIMP is an option worth checking out )
When editing, Be sure to focus on eliminating any spots in the sky as well as any ugly botches which distract you from the beauty of the image. Also focus your attention on the color hues of red orange and yellow, play around with them , They will give your sunset a distinguishable look from the regular ones. Additionally I tend to reduce the highlights to give the sun a more defined shape; also subtly increasing the contrast will give the image a strong body
In concluding, one final tip: Don’t go overboard with editing!
Nothing sores my eye more than a heavily manipulated image. Simplicity is Key!
Check out a before and after picture below of how post-image processing helps your final output.
Before

After

Thank you guys, for reading my tips on how to capture better sunsets. I hope that you found this information helpful and insightful. If so hop into the comments and let me know what you think.
Until next time guys, Peace and Love and Keep Shooting (lol your cameras)


